How to Build the Perfect Charcuterie Board for Any Occasion
There’s something magical about a charcuterie board. It’s not just about the food—it’s about the shared laughter, the curious hands reaching for their favorite bite, and the way a simple spread can bring everyone together.

Whether you’re prepping for a big holiday gathering or just want to create something special for family movie night, a charcuterie board is the perfect way to add a touch of fun, flavor, and personality to your table.
The best part? You don’t have to be a pro to pull this off. With a few simple steps, a sprinkle of creativity, and your favorite ingredients, you can build a board that’s as unique as the occasion itself.
And the beauty of charcuterie is how adaptable it is—you can make it vegetarian, dessert-only, kid-friendly, or even holiday-themed with just a few tweaks.

So, whether you’re crafting a board for Easter, Christmas, or a casual afternoon snack, I’ll guide you step-by-step to create a charcuterie board that’s sure to delight everyone (and make you feel like a hosting rockstar). Let’s get started!
Step 1: Pick Your Base

You don’t need a fancy cutting board or platter to create a charcuterie board that wows. The key is to work with what you have—or get creative with themed options!
Here are a few ideas:
- A classic wooden board or marble tray works for any occasion.
- For holidays, consider fun shapes like bunny- or egg-shaped boards for Easter, or a Christmas tree-shaped platter in December.
- Mini baskets or egg cartons are adorable for small portions and great for personalizing for kids.
- Even a simple baking sheet lined with parchment paper or a pretty napkin can do the trick!
No matter what you choose, the goal is to create a base that’s inviting and easy for everyone to gather around.
Step 2: Build the Basics

The foundation of any charcuterie board is a balance of flavors, textures, and colors. Here’s a simple formula to follow:
- Cheeses: Include at least 2–3 types, such as a creamy brie, a sharp cheddar, and a hard cheese like manchego.
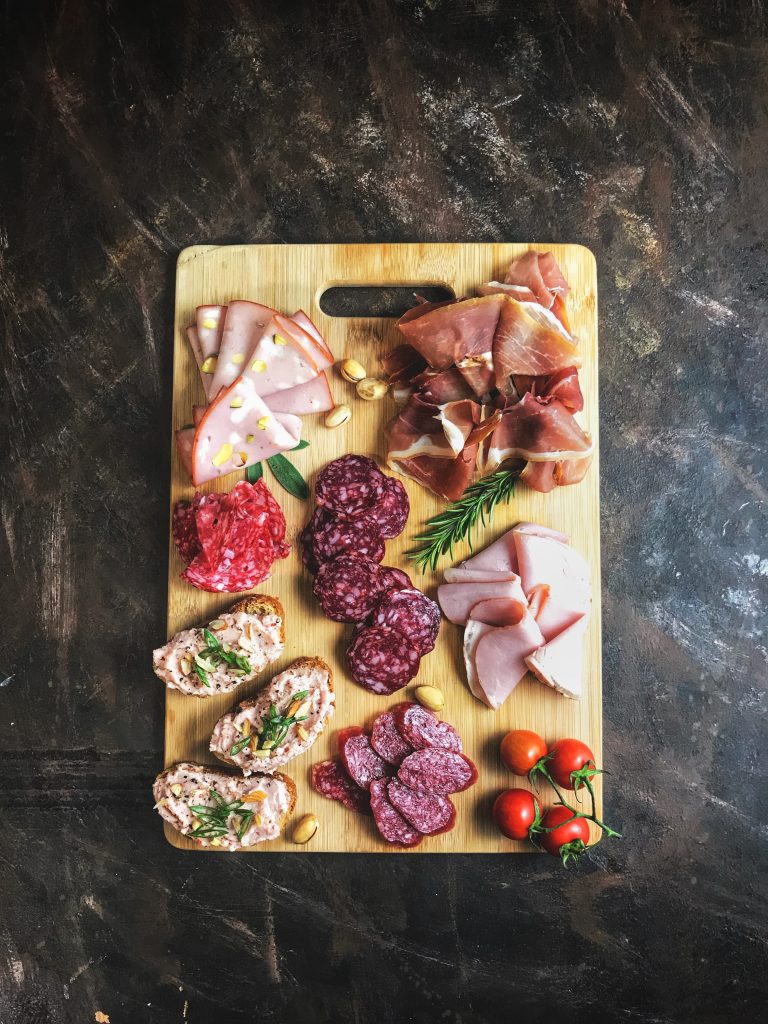
- Meats: Think prosciutto, salami, or even sliced ham for a nod to Easter. (Or skip the meat altogether for a vegetarian board!)
- Crackers and Bread: Add variety with whole-grain crackers, baguette slices, and breadsticks.
- Fresh Fruits and Veggies: Grapes, strawberries, and kiwi for sweetness; baby carrots, cherry tomatoes, and cucumber slices for crunch.
- Dips and Spreads: Hummus, ranch, honey, or a seasonal jam (cranberry for Christmas, or apricot for Easter).
- Extras: Chocolate, nuts, or pickles to round out the flavors.
Step 3: Make It Holiday-Specific

This is where the fun begins! A few small tweaks can make your charcuterie board feel like it’s made for the occasion.
For Easter
- Shapes Matter: Use cookie cutters to create bunny- or egg-shaped cheese slices, or cut fruits into flowers and crosses.
- Add Spring Colors: Include pastel-colored macarons, marshmallow chicks, and mini chocolate eggs for that fresh Easter vibe.
- Fresh Vegetables: Baby carrots, radishes, and snap peas add a garden feel.
For Christmas
- Think Red and Green: Add red grapes, pomegranate seeds, and green apple slices. Pair them with white cheeses for a festive color palette.
- Holiday Shapes: Arrange meat and cheese slices into the shape of a Christmas tree or wreath.
- Festive Treats: Candy canes, gingerbread cookies, or spiced nuts make great seasonal additions.
For Any Occasion
- Adjust your colors, flavors, and shapes to fit the vibe. For summer BBQs, lean into fresh fruits like watermelon and pineapple. For fall gatherings, use warm flavors like dried figs, roasted nuts, and pumpkin crackers.
Step 4: Arrange with Love

Here’s the secret to arranging a charcuterie board: there’s no “wrong” way to do it. The goal is to have fun and make it feel abundant.
- Start Big: Place your largest items first (cheese blocks, bowls for dips).
- Layer in Color: Alternate colors and textures to create visual interest—place bright strawberries next to a creamy brie, or crunchy crackers beside soft cheese.
- Fill the Gaps: Use smaller items like nuts, dried fruit, or candy to fill in empty spaces.
If you’re feeling creative, arrange your ingredients into fun shapes, like a bunny face for Easter or a star for the Fourth of July.
Step 5: Keep It Simple and Fun
Charcuterie boards are meant to be a celebration of the moment, not a source of stress. Here are a few ways to make it easy:
- Use Pre-Sliced Items: Pre-cut cheeses, fruits, and deli meats save time.
- Mix Store-Bought and Homemade: Pair store-bought crackers with a homemade dip for balance.
- Get the Kids Involved: Let them use cookie cutters or place the candy—they’ll love being part of the process!
Step 6: Enjoy the Moment

The best thing about a charcuterie board is how it brings people together. Place it in the center of your table, encourage everyone to grab their favorites, and enjoy the conversations and laughter that follow. It’s not about perfection—it’s about the joy of sharing good food with the people you love.
Want More Ideas?
Looking for holiday-specific inspiration? Check out my Charcuterie Board Printable Planners for Mediterranean Charcuterie Board, and Dessert Board Charcuterie ideas for every celebration.
Final Thought
Charcuterie boards are the perfect blend of creativity, simplicity, and connection. Whether you’re crafting a board for Easter brunch, a cozy Christmas gathering, or a casual weeknight treat, they’re a beautiful way to bring everyone together. So grab your favorite ingredients, let your imagination run wild, and create a charcuterie board that’s as special as the people you’re sharing it with.
Would you like help planning specific boards or creating an ingredient checklist? Let me know—I’d love to help!